Archive
EverDrive Problems?
I am not affiliated with EverDrive, Krikzz or any of the official resellers
It seems many people are having problems with their EverDrive carts.
Many in the forums at krikzz.com, and some come to this blog asking for help.
But as stated by the waranty page, clones will not get support in the forums, and will not be repaired if shipped there.
Warranty
The thing is, cheap clones exist out there, and they are cheap for a reason.
Cloned Everdrive help? Look no further…
If you are planning to buy an EverDrive, make sure to buy an original unit, and not cheap defective knock-offs…
Here’s why you want to avoid eBay and AliExpress:
Loading Problems on Some Games
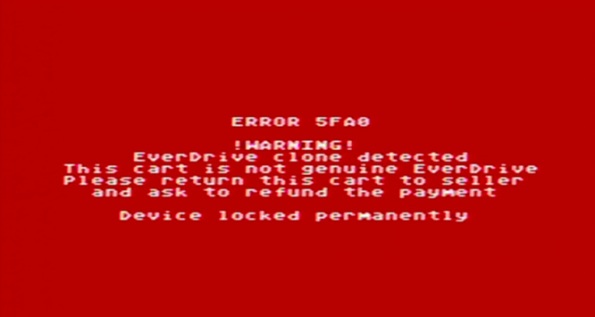
Some games work perfect, some games just a black screen (WARNING! N8 Clones)
What happend to my everdrive ? Did I damage it ?
Trouble with OS Update
Cloned N8 everdrive
SED2SNES fakes?
Super Everdrive China version – problem!!!
Many more are available in the forum…
All the dealers who sell real EverDrives are listed on krikzz.com
EverDrive Dealers
I like the original products, so I think the money should go to the original creator, so I will not help anyone who support these scammers with their money.
The users at the support-forum are usually very friendly and helpful, but they won’t help peoople who bought knock-off carts either.
Cloned N8 everdrive
The files located here will help you identify fake carts:
http://krikzz.com/pub/support/var/everdrive-clones/
Some even claim to sell real hardware like JackDIY and misc sellers on AliExpress and/or eBay.
To get fully working products with warranty and support, buy only from sellers on the official dealer list
Don’t try to get free support for fake carts…
PS: I am not affiliated with EverDrive, Krikzz or any of the dealer on the list
I just got tired of reading about all those people getting scammed, while the scammers get lots of money, and the one who made the products get nothing.
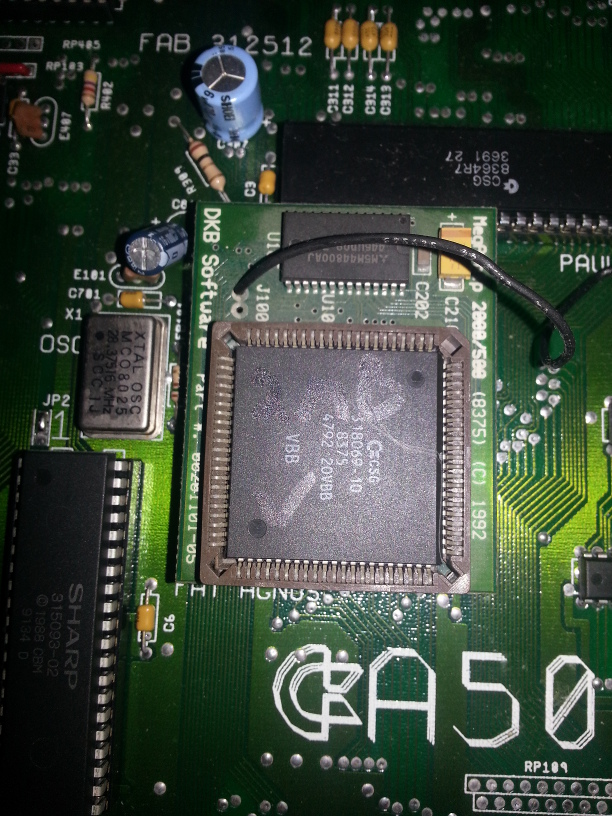
Amiga : Converting to full ECS
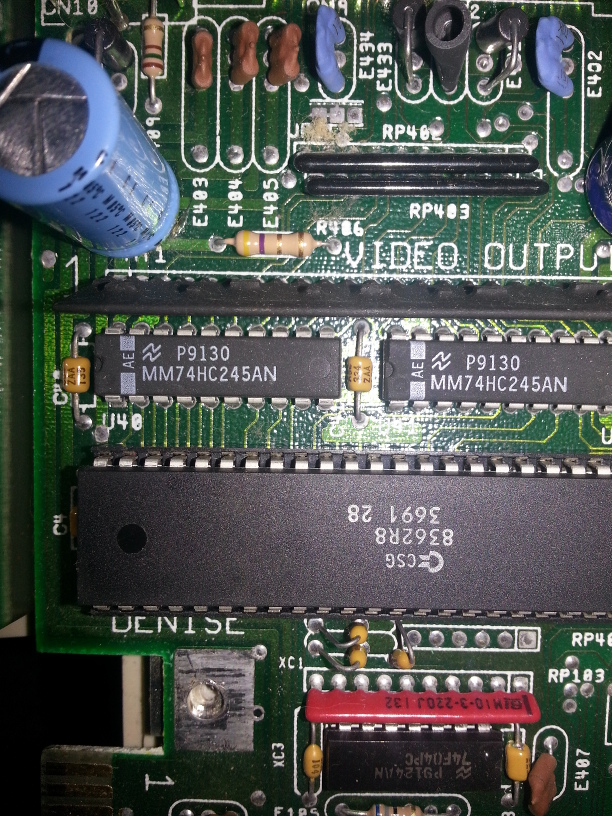
Now that the best Agnus available is installed, we just need the best Denise. Denise is pin compatible, so we won’t need an adapter.
Here’s OCS Denise (8362r8):
Since I don’t know how this really shuld be done, I just put the tiniest flathead screwdriver i have under the chip, and carefully forced it up. Extreme care should be taken as not to bend the chip’s pins!
And here’s HiRes Denise (8373r4) in her place:
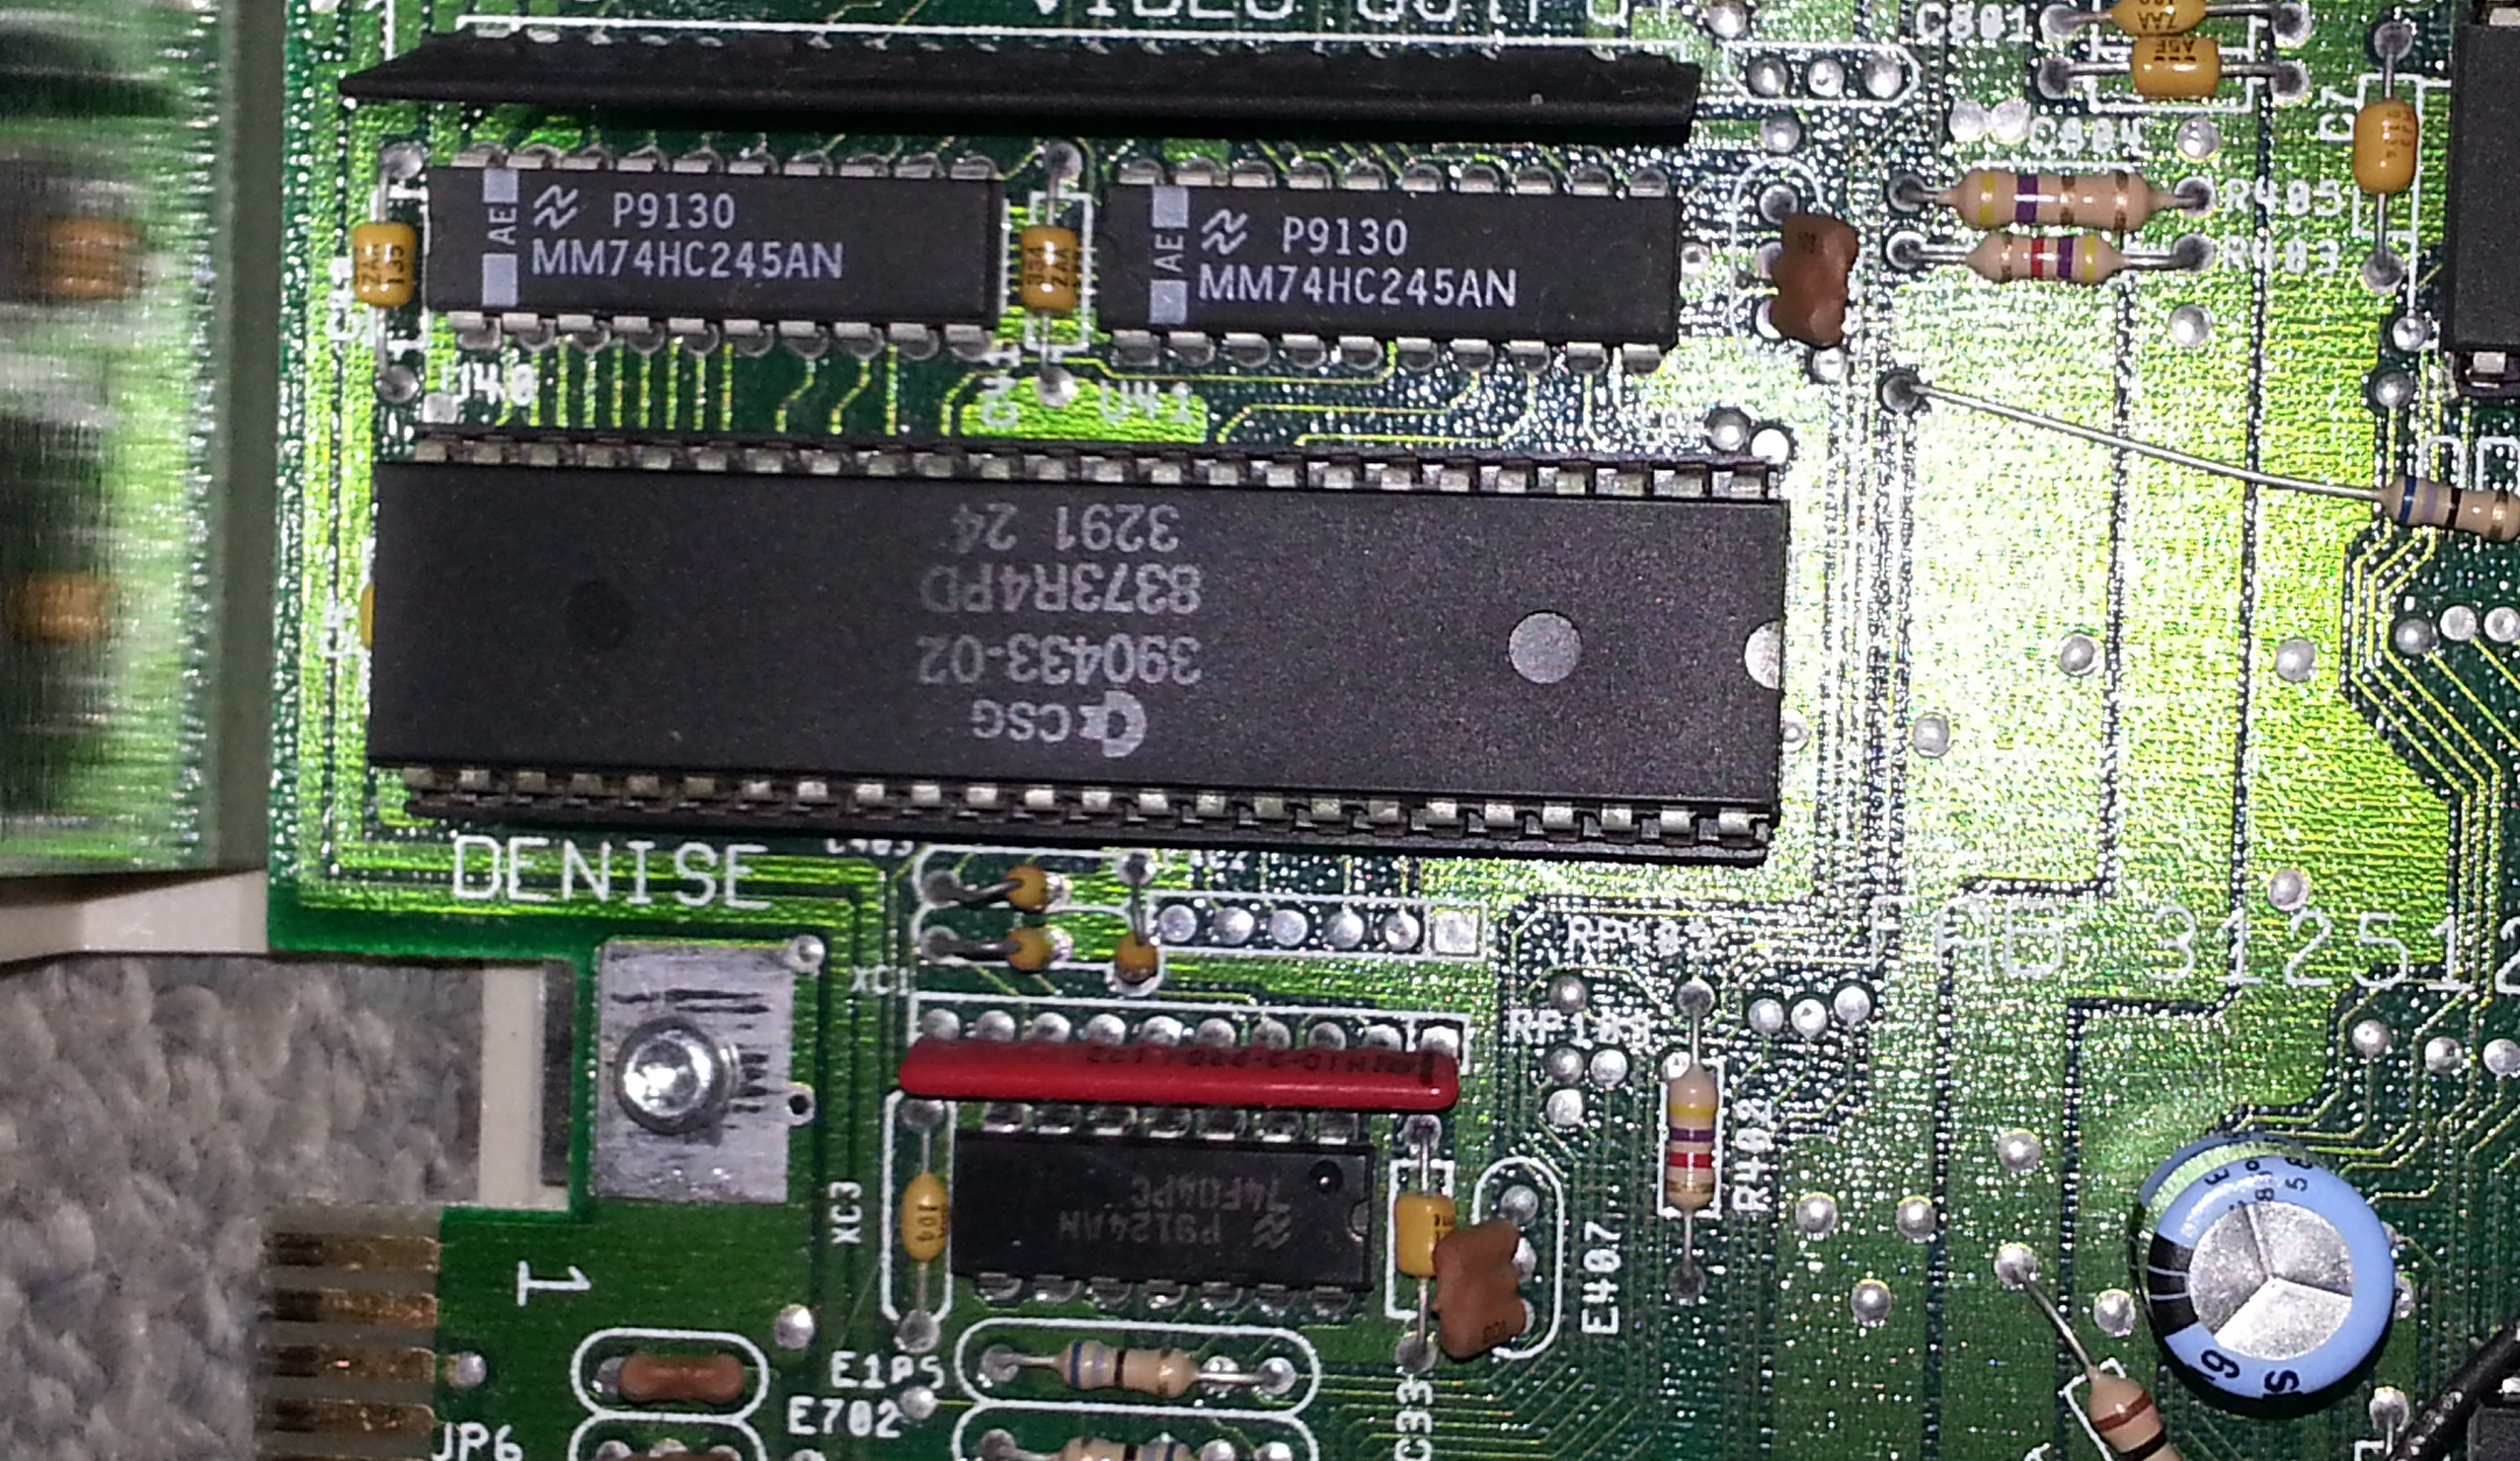
And here you can see that she’s located at the upper left portion of the motherboard:
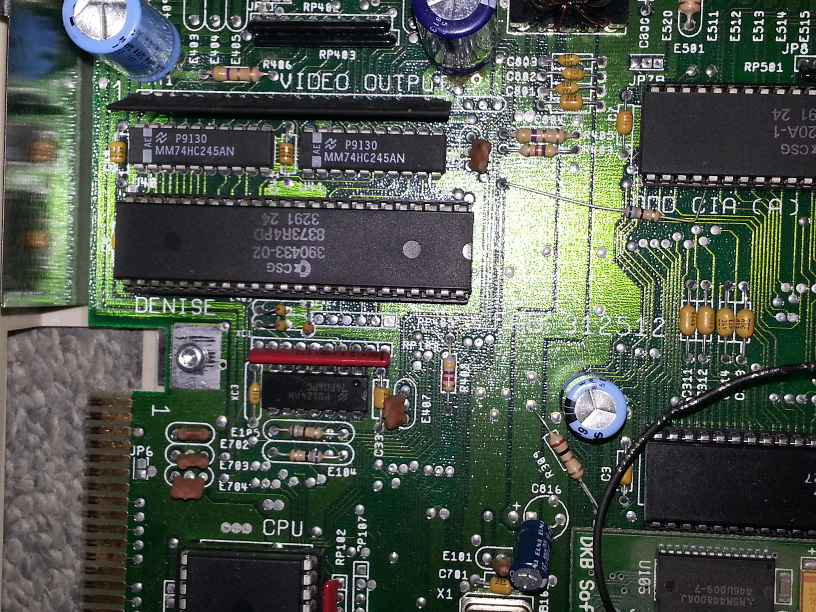
You can even see the edge of the Agnus adapter card in the bottom right corner 🙂
If this A500 had a Kickstart 1.4, and a new clock battery on the RAM expansion board, she would now be a fully functional A500+ 🙂
Amiga : ChipRAM expansion
A while ago I recieved some chips for my A500, They’ve just been lying around waiting for me to get some free time.
For now I’ll do the Motherboard SlowRAM to ChipRAM mod, and Install the DKB MegAChip. Since the tutorial i link to contains pictures of the mod, I’ll just add pictures of the Agnus swap & MegAChip adapter.
Here’s the Socket on the Motherboard with the original (1MB) 8372A:

Here I didn’t want to risk destroying the chip or socket, so I got a PLCC extractor to remove the chip.
Here’s a pic of the adapter installed in the Agnus slot, and the Super Agnus (8375) installed in the adapter.
Then I added the lead to pin 36 on Gary.
This is what that looks like:
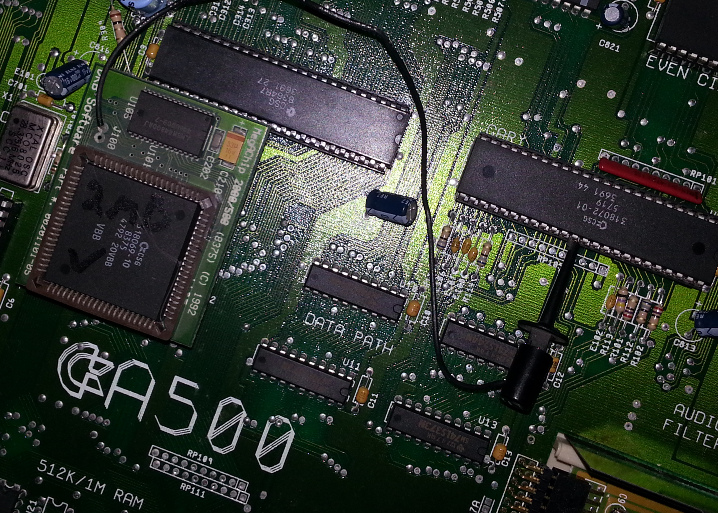
So now I’m at 2MB ChipRAM.
512k @ MB
512k @ Trapdoor
1024k @ DKB MegAChip
Modding my Amiga 500: The surprise
When i inspected the A500, I saw something that’s not good 😦
The battery for the Amiga’s clock had started leaking. The stuff that leaks from these batteries is very corrosive
, so this is really not good!
The first I did was check to see if the motherboard had started corroding. At that point I got lucky. The only thing affected was the RAM expansion.
I forgot to take pictures before removing battery and cleaning, but here you can see the expansion with battery removed:
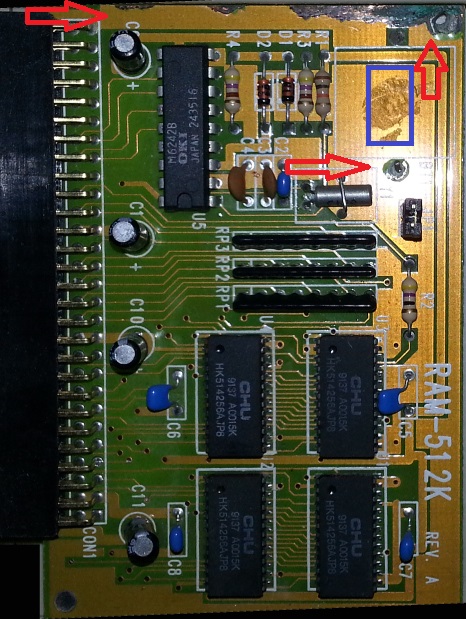
The red arrows point to the corrosion.
The blue rectangle is approximately where the battery was.
Here is a zoomed view:

I used a pair of small pliers and snipped the leads to the battery, and then ripped it off the board.
I cleaned the residue, and the corrosion with rubbing alcohol and a toothbrush.
Then i rinsed it well with clean water and set it to dry.
RAM expansion is dried and tested. A500 boots without a hitch, and RAM is detected in Workbench 🙂
Yay!
Modding my Amiga 500: The Plan
The plan so far:
* Get 2MB Chip RAM
* Get full ECS (Enhanced Chip Set)
* Floppy Emulation
* Get the Zeus68k (Accelerator, IDE controller, Kickstart switcher, Fast RAM expansion, Freezer e.t.c) (http://eab.abime.net/showthread.php?t=65047) or feasible alternative.
SD2SNES Setup Tutorial
When I got this great flashcart I found no guide or tutorial to set it up, so I’ll write the steps here in a easy to follow numbered list 😉
First i tried the latest firmware (0.1.5), and found that my SNES would hang in the SD2SNES menu all the time, but if I started a game it all worked perfect. Then I tried 0.1.4a, that worked great 🙂
First, I'll advise that you format your SD card to get rid of any file system errors.Just use the normal Windows formatter and format it as FAT32 with default cluster sizes.
Getting firmware from the official sd2snes blog, here's a direct link to the downloads section.
Download the latest firmware (except 0.1.5) and extract the zip to the sd card. There should now be an sd2snes folder in the root of the sd card containing:
bsxpage.bin

cx4.bin

firmware.img

fpga_base.bit

fpga_cx4.bit

menu.bin

sd2snes.db

sd2snes.dir
Now you need to get some extra files and add them to the sd2snes folder:
dsp1.bin

dsp1b.bin

dsp2.bin

dsp3.bin

dsp4.bin

st0010.bin
I found these at Stone Age Gamer. Go to the SD2SNES page, click downloads, and download the files. Extract them to the SD2SNES folder on the SD card.
Now create a new folder on SD root, and put your roms in it. Do not put roms in the SD2SNES folder, since that's a system folder, and it won't show up in the menu.
Safely remove SD card, then put it in your SD2SNES. Put the SD2SNES in your SNES, then power it up.
Enjoy playing 🙂
Edit:
There’s a setup guide for the SD2SNES at the downloads page on the official SD2SNES blog. I just didn’t remember at the time of writing.
Everdrive N8 Cheats Tutorial
If after setting up the N8, you find that earlier generation games are too hard, this guide is for you 🙂
- Find cheats for your game in GameGenie format.
- Open Notepad
- Paste the cheats you want to use into notepad
halves of code should be separated by “-” for example ZEXP-YGLA or SXI-OPA
code separation doesn’t matter, but I have one code for each line in my files. - Save file as 8-bit ansi text format. And use the name of the game, and name of cheats for filename.
- You should only add the cheats you want to use, since you can’t select cheats. ALL cheats in the file you load will be activated.
- When EDN8 is in NES, and NES is powered on, find the game you want, select “Select Only”
- Select your cheats file and load it.
- Press “START” on your controller to launch game with cheats 🙂
Everdrive N8 Setup Tutorial
The reason for this post is that there’s not any good tutorials/guides on how to set this up.
When I write things in quotes, you should use what’s between the quote signs, and EXACTLY like i’ve written it.
The first thing you’ll need is the cart (EDN8: Stoneage Gamer, Retrogate), an SD card, and a computer that can access the SD card.
When you have those things you can just follow these steps to get it working.
- Format SD Card
This step is important, because it’ll remove any file system errors on the card.
Krikzz himself recomend you just use windows to format cards and copy roms. - Make Firmware folder on SD Card
create a folder on the root of the SD Card, and name it “EDFC” - Download & Extract Firmware
The best place to get this is from the manufacturer’s site (krikzz.com) (Direct link to EDN8 Firmwares)
Download the latest firmware, and extract it to the EDFC folder on SD root. - Make folder for roms
Make a new folder on SD root, anme it whatever you like, and put the roms in it. - Safely eject SD card, and put it in your EDN8
- Put EDN8 in NES
- Power on your NES
If NES power light just keeps blinking, the EDN8 isn’t set to your region. To fix this, just press the RESET button on your NES repeatedly 5-7 times. - Play games:
open folders/select files with “B” button
go back with “A” button
start previously loaded game with “START” button
open menu with “SELECT” button
go up / down file lists with “Up” / “Down”
next / previous page in file list is accessed with “Left” and “Right”
